Pages

Saturday, February 24, 2018

Island Batik Mini Quilt

After being accepted as an 2018 Island Batik Ambassador I have been anxiously waiting for the box that Island Batik so generously has sent me. I have been following the tracking of the package, as shipments from the US always takes a long time.

My package is currently being held "hostage" by the customs authorities, and some extended paperwork is needed to get it released.


In the mean time I am making my second challenge quilt for the month with the only Island Batik fabric I have in my stash, the leftovers from the stack of 5" squares of Tide Pools that I used for my Galentine's Day project .


I used the rest of the stack to make the maximum amount of half square triangles, 2.5" square finished. The inspiration for this mini quilt is the Postcard from Sweden quilt made by Jeli Quilts.


After sewing all the HSTs together the top looked liked this on my design wall.


I used a combination of straight line quilting and stippling, all with Aurifil 50wt thread. The batting used is Hobbs Thermore, which is very thin and perfect for mini quilts and wall hangings.


I outlined a 'postcard' in the quilt with straight line crosshatch design with a teal thread, and dense stippling with a variegated green/neutral thread in the background. I added a narrow grayish blue ribbon to outline the postcard, and stitched it down with a zigzag stitch in golden Aurifil thread.

I named my mini quilt Postcard from Bali. It is 20" x 17.5" after quilting.


Since I didn't have any batik fabric for backing, I used a piece of my Ikea Britten Nummer, which is perfect for a postcard.


Now I am just waiting for my Island Batik box to arrive so I can put binding on my mini quilt and finish it.

Looking forward to the next months' challenge projects!


Friday, February 23, 2018

Starry Sky for Karin


The Rakish Needle round robin quilt top that belongs to Karin in Germany arrived at my home in November last year. Katrin added the large piece on the right with the big planet and Sputnik. I used quite some time wondering what to add to the top. Maja came up with the first idea without even knowing about it. She designed a paper pieced star that I felt fitted perfectly to the scene.


This is my version of Maja's 'Christmas Star' that I blogged about here , I had fun making this beautiful star. It is kind of a nice coincidence that I am sending the quilt top to Maja who will finish the last round of the Rakish Needle Robin before the top is returned to the owner, Karin.


This is how the star looks inserted into the quilt top.


When I was at my quilt guild meeting in January I showed some progress photos of the top to a few ladies. One of them suggested to make something from Star Wars to put into the quilt. I searched the net and found this little beauty designed by Quiet Play. My version of the Death Star fits perfectly into the quilt top.


Then there was the last blue space on the quilt that had to be filled. I decided that a planet would be perfect, and one of the most visual planets is Saturn with its characteristic rings. The Saturn design shown here is my own creation.

I had the perfect fabrics, both for the planet body and the rings. The rings are bias tape of the same fabric in different colors, and it looks as if there are rocks and debris swirling around the planet.

Unfortunately I didn't take any progress pictures when making this. The way I made it was to cut out the planet body first, then I pressed a quarter inch seam allowance around the edge and glued the planet to the background with a few drops of water soluble glue in the center. After having made the bias tape I started with the darkest ring and glued it in place, and tucked the ends under the planet. Then I carefully stitched down both edges of the bias.

After all the rings were stitched down I trimmed the edges of the bias and sewed the planet body down by hand with a matching thread color.


The completed top after my round has gotten really big, there's hardly enough floor space to show it off.


My son helped me in the photo shoot outdoors. The outer space has never looked this good, thanks to the contribution of Karin, Rachel, Ileana and Katrin. Now it will be packed up and sent to Maja in Poland and she will do her magic on the quilt top before it is returned to the owner, Karin.

I am looking forward to seeing all completed tops sometime later this year. It will be a gorgeous display in the end!


Thursday, February 22, 2018

Round Robin Quilt for Rachel


One thing I realized, is that I have never blogged about the previous quilt top I worked on in this round robin. This is Rachel's top. I added the grey staggered border around the teal.

I love the movement and contrast my border makes to the teal and yellow inside. In the corners I added paper pieced arrows of my own design. The dark red border on the outside was sewn on as a protection for a somewhat fraying fabric in the corner blocks. Let's see if this border will be kept in the top, or maybe the next person in line has other ideas! Maja is free to choose.

This quilt is going to look gorgeous in the end! I have really enjoyed being a part of this Rakish Needle Robin!

Monday, February 12, 2018

Galentine's Day Mug Rug

As a brand new Island Batik Ambassador for 2018 one of my first challenges was to create a postcard or mug rug for Galentine's Day.


"Galentine's Day is a celebration of our best gal pals and lady friends, and is the day before Valentine's Day. Why shouldn't we celebrate our fellow females who encourage and inspire us?!"

I was supposed to use fabrics from the box that Island Batik is so generously shipping to me, but the box is still in transit and will not arrive until later this month. What to do then?


I remembered that I won a giveaway hosted by Joan of Moose Stash Quilting a little bit over a year ago. The prize was a stack of 5" squares of the Tide Pools collection from Island Batik! Yes, I had some of their batiks in my possession! I searched my stash and found the so called Island Stamp stack of squares.


With this limited amount of fabric I went searching for an appropriate pattern, and I found a free one at Craftsy. It uses only 5" squares, and it worked out perfectly with the fabrics on hand. 


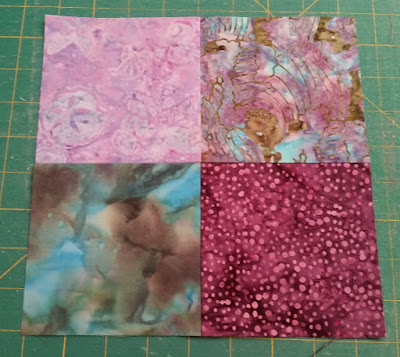
 The back is a four-patch of the purple/green/aqua colors of the stack.


This is the assembled sandwich before sewing all the layers together.


After turning the mug rug right-side out, stitching around the outside edge, and adding some in-the-ditch quilting, it looks like this. My mug rug is 8" square. I like the 3D-effect of the folded flying geese!
 

The quilting shows off better on the back. I love the colors of this side of the mug rug.

I am now patiently waiting for my box of batiks, lets hope they arrive before my next challenge is due! If not, I still have an amount of the 5" squares as a backup.

Tuesday, February 6, 2018

Put A Little Love In Your Quilt - winner chosen!

Just Let Me Quilt


When Carol of Just Let Me Quilt announced this blog hop I just knew I had to join. I have missed the blog hops that Mdm Samm organized a few years back.


Over the last year or so I have been falling more and more in love with foundation paper piecing, but the love really started to bloom almost exactly one year ago when I started to pattern test for Berene of Happy Sew Lucky.

The Love Tattoo pattern is perfect as the first entry of my day in this blog hop. This piece will eventually become a part of a big quilt which  Berene is currently designing.


This is another one of Berene's heart patterns. It is an example of hearts not only being sweet and lovely. I checked my archives, and I made this piece in April 2017, way before the ‘famous’ book was published.


This 'I Heart You' mini quilt designed by Allison of Cluck Cluck Sew was one of the first projects that came into my mind when the blog hop was announced. The pieced mini quilt has been very popular lately, with its own hashtag on social media. I think the mini is awfully cute, and it was very fulfilling to make it. I had lots of fun quilting it, with different designs for the hearts, both straight lines and FMQ, and matchstick quilting for the background.


The last project I am showing in this blog hop is a colorful tote. I found the #lovewinshearts template years ago, created by Amy Gunson of Badskirt for Sew Mama Sew. I knew this would be perfect for a tote bag. I straight line quilted the panel and added some big stitch hand quilting around the hearts.


I used a tutorial from Jedi Craft Girl and modified it a bit to fit the heart panel.


The main fabric for the tote is shown better on the back side. This is a gorgeous black and white print from Ikea that I had in my stash, it is dated 2008 on the selvage.


I also added a recessed zipper for extra closure of the bag. I think this will be one of my favorite totes, it is big and roomy.

Please visit the other bloggers that are posting today, and leave them a nice comment!


February 7

Vicki’s Crafts and Quilting

 
GIVEAWAY CLOSED!
Winner is #11 Rosalind Gutierrez, congratulations! Email is sent.

What about the giveaway?! 


I am having a little giveaway here on my blog: I am giving away a 20” cut, WOF, of Pristine from Robert Kaufman, Sweet pink roses.

To be in the drawing leave me a comment telling me if you like foundation paper piecing, or not.
If you follow my blog, you can leave leave a separate entry for an additional chance. 

I will let Random Number Generator choose the winner on Sunday February 11, and announce the lucky person here on the blog and by email.

Good luck!