Pages

Showing posts with label Pouch. Show all posts

Monday, January 23, 2023

Golden Zipper Pouch


This is my latest pouch made. It is relatively large, and the starting point is the Open Wide Pouch by Noodlehead.

I made the exterior using the Quilt As You Go method, using leftover fabrics in fall colors. The design is log cabin'ish.


 A little bit different design for the front and back. I used a yellow/golden zipper and the lining is a dark red solid. I added a homemade zipper charm made from crocheted Aurifil wool embroidery thread with a matching bead.


Keep on quilting!


Sunday, September 25, 2022

Halloween Pouch

 Holloween is in a month's time, and those kind of projects are popping up all over Instagram. I have made two Halloween quilts in my early days as a quilter, Number 1Number 2 . Wow, it was actually 10 years ago!


 I figured out it was time to make another Halloween timed project, this time a practical pouch. Noodlehead's Open Wide pouch is my go-to pattern. Focus fabric is from my stash, and the bottom is recycled denim.


 The backside is a huge spiderweb!
I folded a strip of pumpkin fabric and sewed it in between the top and bottom fabric.


The lining fabric is black with orange dots, so appropriate! A fast and fun little project.


Sunday, October 31, 2021

Dumpling Pouch

 Last year I took up tatting again and made this cute little project "wreath" with my shuttle. I mounted it on a piece of Liberty fabric, and that was it. The project has been stored in my bins the whole time, with me wondering what to do with it.


 With the Wips-B-Gone 100 day challenge I finally decided what to do. Michelle at michellepatterns.com has the cutest Dumling Pouch patterns. This is the bigger version. Wonder clips for size comparison.


 The pouch is perfect for my tatting supplies, and I will never forget what's inside this pouch!


Happy Halloween!


Friday, October 29, 2021

Flying Geese Pouch


 I made a little pouch from scraps and stash. For me this was a new method of making these particular flying geese. I probably won't make them again, because there was quite a lot of waste in the process. But, one has to try things out, though.

Even the zipper is a recycled one, so this is totally a win-win project.


Monday, March 9, 2020

Cat-Eye Pouch

Some time ago I won three FQs of this cute fabric line in a giveaway. Unfortunately I have lost the name of the line and designer, maybe someone can help me?


After having made quite a few big quilts I needed to make something small, so I decided to make a cute pouch I found this free tutorial for.


I fell for the design of the pouch right away, and the fabric I had available was perfect for it. See how cute the bird looks in the forest!


The backside of the pouch is almost as good looking as the front.


The lining is the 'icing on the cake, it makes the pouch complete and perfect!

This little pouch will be cherished!


Friday, November 22, 2019

New Favorite Pouch


A couple of days ago I took a deep-dive into my selvage bin and admired all the great designs. The selvages are way too pretty to be put in the trash, so I decided to make a pouch from them.

I started out by sewing selvages on a base of home decor fabric, this provides extra stiffness to the piece. Two panels were made, and they were cut to size using the Open Wide Pouch pattern by Anna Graham of Noodlehead.


The pattern used is the medium size of the pouch. Dark blue (almost black) denim was used for the bottom. A red zipper is a nice contrast.


I used dark red home decor fabric for the lining. This adds to the sturdiness of the pouch.

This will definitely become my new favorite pouch, great to stuff with sewing supplies and take along to guild meetings and sew-alongs.

Keep on sewing!

Thursday, November 30, 2017

HST Pouch


As a lot of quilters probably experiences, there are a lot of scraps in the cutting process that can be used for something if you save them. This is a pouch that proves that statement.

The HST panels were pieced and quilted a year or so ago. The HSTs were leftovers from making a tablerunner some time ago. In addition to the panels, I used chambray for the borders.


This is the other side of the pouch. I used a tutorial from Fabric Mutt to make it, modifying the design and measurements a little bit.


My berry bush in a winter state is a perfect stand for taking pictures in natural light. We just have a few hours of good light during the day, now. The lining adds to the cool color template of the scenery, remember it is freezing, but without snow!

Keep on quilting!

Tuesday, October 31, 2017

My First Zip-Up Tray Pouch


In August I won a giveaway by Sandy from the blog Upstairs Hobby Room. The prize was a kit and pattern for making the Zip-Up Tray Pouch by Aneela Hoey The kit contained two beautiful prints and a green solid, in addition to a separating zipper.


I had to go shopping for heavyweight fusible interfacing. It is essential for the pouch to be very stiff, so it is not possible to use regular interfacing or batting.


I chose to use the rose fabric for the exterior and the solid green for the interior. It is much easier to keep track of all the stuff you put inside if the interior fabric is not too busy, and the green is perfect as a contrast to the rose fabric. The pink binding (from my stash) completes the pouch very well.

Most of the construction of the pouch is pretty simple, the pattern is well written with lots of instructive diagrams. The last part of hand sewing the binding to the pouch was a bit tricky, but it turned out pretty good. I have bought extra interfacing for at least one more pouch, and I plan on making another one soon.

The zip-up tray pouch is very practical the way it pops up to become a tray when the zipper is opened. That gives a great working space for small hand sewing projects when on travel or at guild meetings, for instance. I know I will get lots of use of my new pouch!

Keep on quilting!

Tuesday, November 15, 2016

November Crafting

When I saw Heidi Staples' tutorial for the Trinket Case on her blog FabricMutt, I knew I had to make it.  I am working a lot in 3D, 2D projects are more my kind of work. But, I have to challenge myself from time to time, so this was the right project. With an excellent tutorial, this turned out to be a piece of cake!

Here are the side panels, I used a mini charm pack of Daysail by Bonnie & Camille. In addition I used Chambray for the exterior.


For the lining I used a fun print that I bought at Hancock's Fabric a few years back.


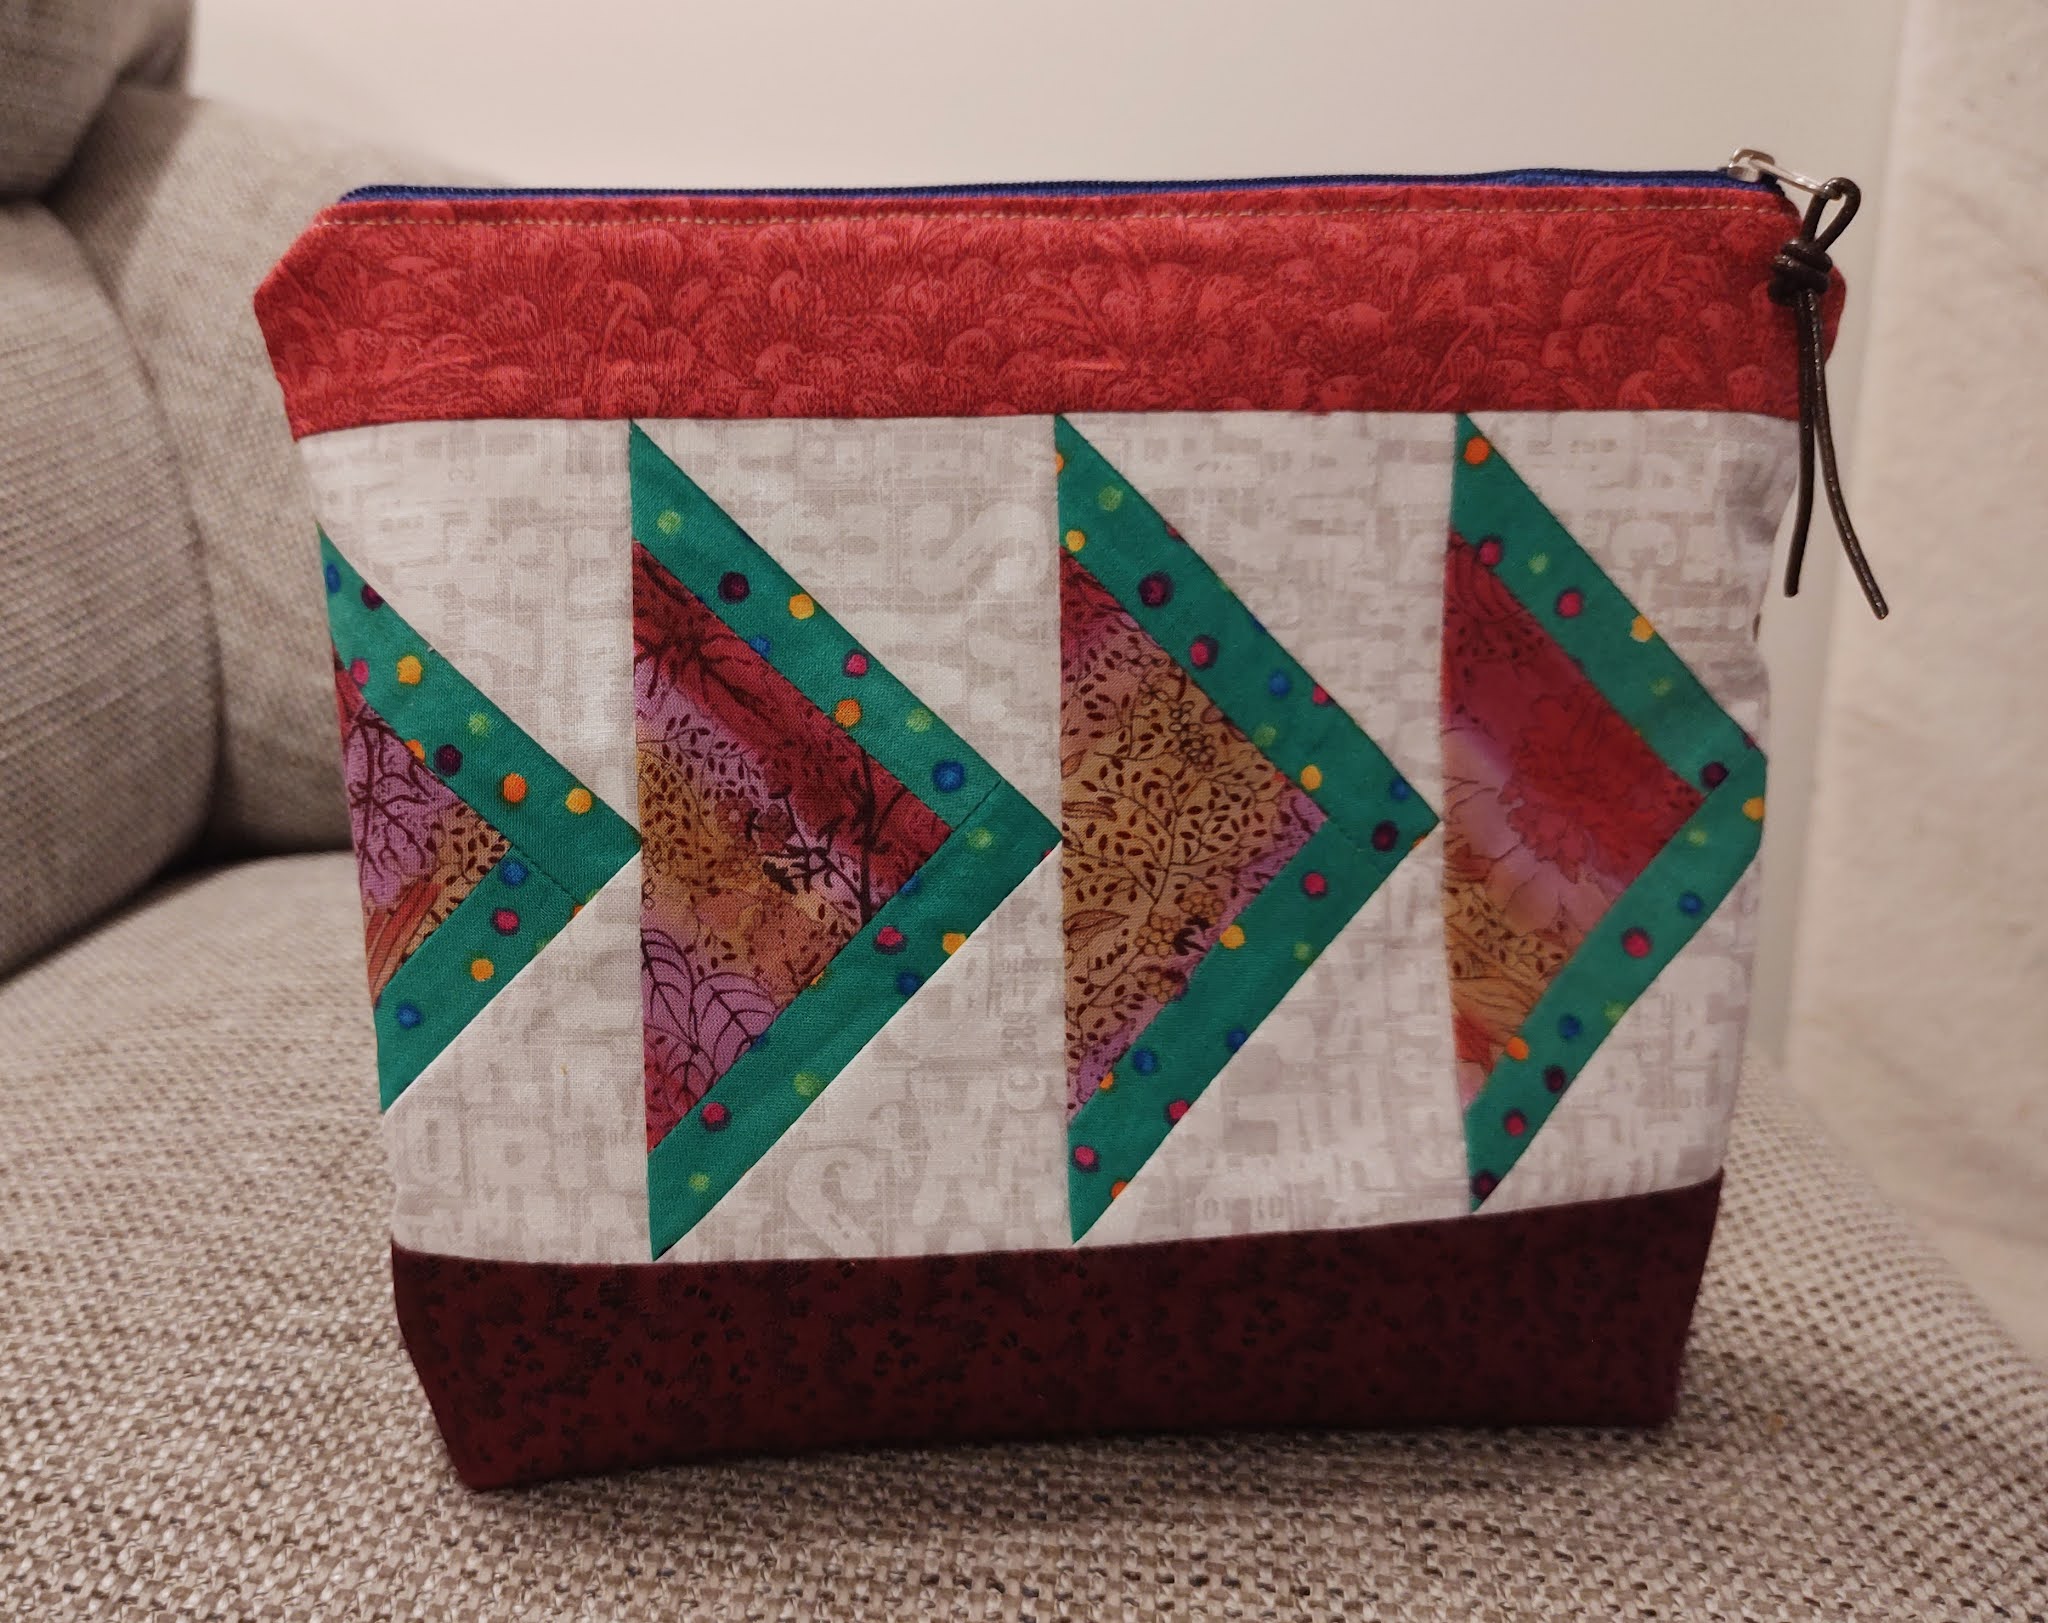
Here is the finished Trinket case.


It is nice to make small items once in a while, so I decided to make a pair of potholders for my son's apartment. I am trying to keep the colors in the masculine range, and what is more natural than blue and green? (That's by the way my favorite color combination). I used (big) scraps in this crazy log cabin/improv-style set of potholders.


The back is also masculine, like a lumber-jack's shirt. The quilting in the ditch shows off well on the back.

It is very fulfilling to finish quick projects, I have to do that more often!

Keep on quilting!

Sunday, July 12, 2015

My Itty Bitty Owl Found a Place to Stay


Here is my first finish for July; made in a break in-between quilting of the wedding gift. The pattern is the Open Wide Zippered Pouch by Noodlehead. On the front I used the option for the Contrast Bottom Pouch, but divided the top panel in three to make room for the cross stitched owl. The fabrics plays well together with the cross stitch motif. Notice the pink zipper pull.


For the back the top panel is just one fabric. I lined the pouch with a marigold solid which compliments the colors of the top panel.


This is how it looks all zippered up. My Itty Bitty Owl can keep a lot of stuff under its wings, and help me stay organized with my sewing gear.

Not only my first finish for July, but also the first finish from my 2015 Q3 - Finish Along List; starting early this quarter!


2015 FAL at On the Windy Side

Happy quilting!

Wednesday, June 18, 2014

Making a friend smile!

A colleague of mine was in Istanbul, Turkey, earlier this year. When she came home she gave me three fabrics she had bought there, quilting cottons with tiny little flowers on. Of course I was surprised and grateful for this fantastic gift. The fabrics were laying around for a long time, but finally I got the time to make something from them. I chose to use my friend's favorite fabric of the three, and made a zippered pouch for her. The free pattern can be found here: pattydoo.de . I used the purple flower fabric she loved, and added some fabrics from my own stash.


View of the outside of the pouch.


The pouch is not big, but it is surprisingly roomy.

When I took the gift to work the next day, she was totally surprised! She had a rough day at work, and wasn't feeling all that great. Getting this pouch cheered her up and brought a big smile on her face; she was HAPPY!

I am so grateful for making her day!

Keep on quilting!

Monday, May 5, 2014

Roosters and Hens

I made a little zippered pouch of one of the fabrics of Lynette Anderson's fabric lines, Mending Fences.


I have plans for this little pouch, but you will have to wait until early June to find out exactly what.


The lining fabric has a zillion small snowflakes, something that is very appropriate. The last four days, that's actually the first four days of May, we've had snow showers, hail and sun, all in a very good mix. The temperatures were very low, and I had to pull out my winter jacket and woolen hat and mittens to be able to go out walking. And the calendar says May! This morning it was freezing, literally.

Let's hope the winter is over for now, and that we will get some warmth in the rest of May. We need it!

Happy quilting!

Wednesday, March 5, 2014

Think Ruffles! – All Ruffled Up

I have to confess, I have not been mad about ruffles, but hey, should I always work in my comfort zone? Why not challenge myself?

This is the first time I have joined one of  Mdm Samm's  blog hops. Thanks to  Amy for being our cheerleader!

I have done a little bit of ruffles approx. one hundred years ago (!), but after my two sons were born we have had a completely ruffle-free house. Now they are off to University, so maybe this is the time to play with some ruffles!?
The first question is: What to make for this blog hop? I could always put ruffles on pillow covers or pouches, but I felt like my main part of work had to be something different and a little more spectacular. The first thing that came into my mind was the class I took with Mrs Moen . She taught improvisation and work with ‘layer upon layer’ techniques. Ruffles could be incorporated in a wall hanging using some of the techniques I learned in her class.

My first entry in this blog hop is called ‘HST Cow All Squared Up’. It is a miniature wall hanging, only 7” x 8”. The half square triangles are made from bonus triangles after making chevrons for Celtic Solstice. (I knew those small triangles would come in handy some time!) The finished HSTs measure ¾”; that’s small! The cow is happily grazing in a pasture of ruffles.

The inspiration came from the following piece of art hanging on the wall at work:

After the ruffled cow was made I wanted to make something more spectacular. This is my main piece; an artistic impression of a peacock:


The gorgeous tail feathers are displayed with multicolored ruffles. The background is made using Mrs Moen’s technique where a green semi see-through curtain fabric is laid on top of a neutral fabric with lots of tiny leaves. With backing and batting all the layers were quilted with vertical straight lines using different colored threads. I did FMQ on the tree to make the wooden structure.

The body of my 'Peacock in Borrowed Feathers'  is fabric from an old dark red glitter top, and the neck and head is leftover from a dress I made when I was a student (!). (You can always find use for old fabric!).

The main eye-catcher in this quilt is the multitude of the batik feathers. I made ruffles of 2.5”x WOF strips for 8 different colors of batiks.

The close-up shows more details of the body and the head. Ric Rac with attached glass beads is like a belt covering up the seams on top of the feathers. Fabric of different textures tones down part of the main body. Large beads acts as the “crown” of the bird, and the eye is a small glass bead.

Of course my peacock had to take a trip out in the woods for a photo shoot. The branch was barely strong enough to hold the quilt.

I found the perfect binding for the wall hanging, it is a multicolored fabric with roses and butterflies, and it really brightens up the edge. The ending dimensions of the wall hanging is approx. 20” x 25”, and it is equipped with a hanging sleeve on the back.

Visit the other blog hop participants today:


March 6th


Quilt in a not-Shell  <--That's me!


The full blog hop schedule is posted HERE .
Sew what about the giveaway?
I have made two more “traditional” ruffled items for the giveaway; a zippered pouch and a pincushion.

 
Two lucky winners will receive one each. Leave a comment to be entered in the giveaway, deadline is March 16, 2014. The winner will be announced on March 17, 2014. Make sure I can contact you via e-mail.
Thanks for stopping by and entering the giveaway! Good luck!
Have a ruffled kind of day!


EDIT March 17: Winners of the Giveaway!

The winners of my giveaway are Elizabeth  and Malini, who both have been contacted by e-mail.